
engine cooling for Citroën 2CV AK-AZU
37 Articles


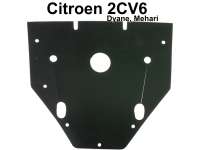
Grid for the engine fan case (602cc). Suitable for Citroen 2CV6, Dyane 6, Mehari. Very good
reproduction. Securement with 4 screws.
Grid for the engine fan case. Suitable for Citroen 2CV6. Reproduction. The grid is galvanized
Securement with 4 screws

Fan blade for 2CV4, Dyane 4, AZU of 250. 8 vanes, color black. Original supplier. Securement with 4
screws. Outside diameter 230mm. Diameter inside: 177mm. Pitch diameter: 162mm.
Fan blade for 2CV6, 9 blades (Or. No. 5433422 or AM241904), Mounted with 6 screws. Outer diameter
265 mm. Inner diameter: approx. 175 mm. Bolt circle: approx. 160 mm. Unfortunately, the quality of this fan blade is not particularly good. Slightly thicker screws may sometimes be required for fitting. The advantage of these fan blades is that they are readily available (the good-quality reproductions are not always in stock) and very low-priced. And once fitted, they work just as well.


Fan blade for 2CV6, 9 vanes, color black. Original supplier. Securement with 6 screws. Outside
diameter 265mm. Diameter inside: 177mm. Pitch diameter: 162mm.
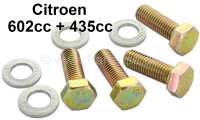
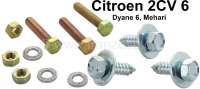
Screw set suitable for the engine cooling system, for Citroen 2CV6. Contants all screws and nuts to
mount the casing sheets and die sealing behind the oil cooler.

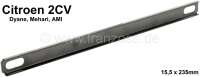
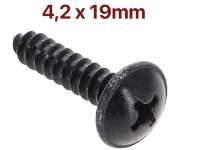
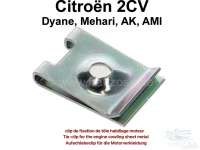
Tie-clip for the engine cowling sheet metal, for Citroen 2CV (8 per side are required. (to it
suitable screw = 20170)
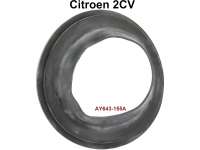
Engine cowling around the liner, above on the left (air circulation). Material sheet metal
Suitable for Citroen 2CV6
Engine cowling around the liner, above on the right (air circulation). Material sheet metal
Suitable for Citroen 2CV6
Engine cowling around the liner, down on the right (air circulation). Material sheet metal
Suitable for Citroen 2CV6.

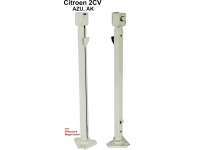
Belt pulley (without fan blade + V-belt), better than original (Made by Franzose). Suitable for
Citroen 2CV6, Dyane, Mehari. The belt pulley has been rotated from a 18kg steel block DIN 1,0501 (AISI/SAE 1040, EN C35). Fine balanced pulley, thus avoiding much pressure on the crankshaft. No risk of tearing off as it is not welded. Belt pulley is yellow galvanised (like original). Made by Franzose/Cipere, entire production process in Europe.
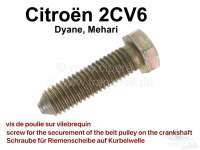
Belt pulley, screw for the securement of the belt pulley on the crankshaft. Suitable for Citroen
2CV, with generator propulsion over V-belts. (2CV6 + 2CV4)

Screw, for the securement of the belt pulley, on the crankshaft. Suitable for Citroen 2CV 16 HP
not fitting for 2CV6! Or.Nr. A24195
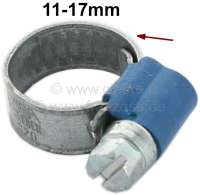
Hose clamp 11-17mm, especially for radiator hose. Vintage look. Embossed band with raised edges
This prevents the hose from being damaged. Small screw housing with 7mm hexagon head screw (with slot). Normal, modern hose clamps squeeze the hose. This is completely avoided with these clamps. And they even look better.
Hose clamp 13-20mm, especially for radiator hose. Vintage look. Embossed band with raised edges
This prevents the hose from being damaged. Small screw housing with 7mm hexagon head screw (with slot). Normal, modern hose clamps squeeze the hose. This is completely avoided with these clamps. And they even look better.
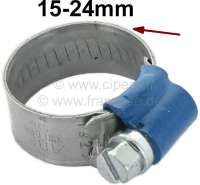
Hose clamp 15-24mm, especially for radiator hose. Vintage look. Embossed band with raised edges
This prevents the hose from being damaged. Small screw housing with 7mm hexagon head screw (with slot). Normal, modern hose clamps squeeze the hose. This is completely avoided with these clamps. And they even look better.
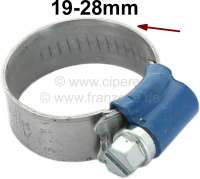
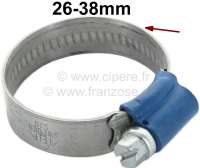
Hose clamp 19-28mm, especially for radiator hose. Vintage look. Embossed band with raised edges
This prevents the hose from being damaged. Small screw housing with 7mm hexagon head screw (with slot). Normal, modern hose clamps squeeze the hose. This is completely avoided with these clamps. And they even look better.
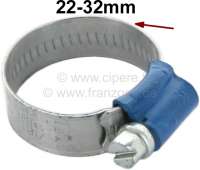
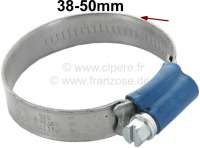
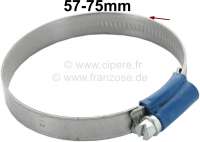
Hose clamp 22-32mm, especially for radiator hose. Vintage look. Embossed band with raised edges
This prevents the hose from being damaged. Small screw housing with 7mm hexagon head screw (with slot). Normal, modern hose clamps squeeze the hose. This is completely avoided with these clamps. And they even look better.


37 Articles
Citroën A-Series Delivery Vans: Cooling, Oil Cooler, and Airflow
The Citroën A-Series delivery van models do not have a water-cooled radiator. The engines in these vehicles are air-cooled two-cylinder boxer engines. Depending on the model, year of manufacture, and variant, different engine displacements were used, including 375 cm³, 425 cm³, 435 cm³, and 602 cm³.
Well-known A-Series delivery van models include the 2CV AU, 2CV AZU, 2CV AK, 2CV AKS 400, and Acadiane. Even though engines, model years, and individual technical details vary, the basic principle remains the same: Engine cooling is achieved through targeted airflow, aided by the engine oil.
For this reason, the coolant level is not checked on these vehicles. What is crucial is that the airflow is directed completely and precisely through the engine and that the oil cooler remains clean, unobstructed, and in good working order.
The most important components of the cooling system are the fan impeller, fan blades, fan housing, cooling air baffles, air ducts, and—depending on the engine variant—the oil cooler. If a part is missing, an air duct is misaligned, or the oil cooler is clogged, the engine can overheat despite appearing to run normally.
Why Airflow Is So Important in Citroën A-Series Delivery Vans
The fan blade is mounted at the front of the engine and directs the cooling air through the fan housing specifically over the cylinders, cylinder heads, and—in engines equipped with one—the oil cooler. The air deflectors on the engine are not a minor detail, but an important part of the cooling system.
They ensure that the cooling air does not escape uncontrollably but reaches the areas where heat needs to be dissipated. This is particularly important for delivery vans, as these vehicles are often subjected to heavier loads, longer trips, lower speeds, or commercial use.
The warm air is then either vented to the outside via the heat exchangers or used for the heater. If the airflow path is incomplete, improperly installed, or leaky, the heating performance inside the vehicle can also deteriorate significantly.
A common issue following engine work is that small air baffles, gaskets, or air ducts are missing or not installed correctly. The engine will then start normally and run smoothly while idling, but it can overheat during extended drives, under heavy loads, in summer heat, on inclines, or when fully loaded.
The Oil Cooler in A-Series Delivery Vans
The oil cooler is located in the airflow and is particularly important for the more powerful engine variants, especially the 602-cm³ engines. It aids in heat dissipation via the engine oil.
The oil cooler can become clogged with oil mist, dust, insects, leaves, and accumulated dirt. Especially in engines with oil leaks, an insulating layer of dirt often forms. Oil binds dust, reducing airflow through the fins.
During maintenance, the oil cooler should therefore not only be checked for leaks but also cleaned on the outside. It is important to work carefully to avoid bending the delicate fins. A soft brush, compressed air used from a sufficient distance, and a suitable cleaner are recommended.
After cleaning, check for oil leaks and ensure that all connections, lines, and fasteners are in good condition.
Fan Assembly and Fan Blades
The fan impeller is a critical engine component in all air-cooled Citroën A-Series delivery vans. It must not be damaged, loose, or improperly installed. After working on the alternator, V-belt, ignition system, front engine housing, or fan housing, always check the following:
- Is the fan impeller seated correctly on the cone?
- Is the central fastener properly tightened?
- Is the fan wheel rubbing against the housing?
- Are any blades broken, bent, or damaged?
- Is the fan housing fully assembled?
- Are all air ducts correctly installed?
- Are the heat exchanger and air hoses properly connected?
A damaged or loose fan impeller can significantly reduce cooling performance and, in the worst case, cause consequential damage to the motor.
Cooling Air Intake and Front Area
Even the best fan is of little help if not enough air is entering the engine compartment from the front. Therefore, the cooling air intake must remain unobstructed. Auxiliary headlights, improperly mounted license plate holders, decorative decals, luggage, accessories, or winter covers can impede airflow.
A winter cover is only useful in cold weather. In milder temperatures, it should be removed so that the engine receives sufficient cooling air.
Particularly with delivery vans, extra care should be taken to ensure that cargo, retrofitted mounts, or accessories do not obstruct the airflow.
Oil Level and Oil Quality
For air-cooled engines in the Citroën A-Series, the oil level is particularly important. Too little oil not only results in poorer lubrication but also in poorer heat dissipation.
The oil level should always be checked before long trips, highway driving, vacation trips, mountain routes, or trips with a heavy load.
Old or heavily contaminated oil is also undesirable. Oil changes should therefore not be unnecessarily delayed. A clean oil circuit, an unobstructed oil cooler, and unimpeded airflow are particularly important for the engine’s longevity.
Typical cooling system weak points in A-Series delivery vans
Clogged oil cooler
A clogged oil cooler is often not clearly visible from the outside until the fan blade and fan housing have been removed. Oil, dust, and dirt can clog the fins to such an extent that hardly any air can flow through them.
Missing or Incorrectly Installed Cooling Air Deflectors
After engine overhauls, clutch work, partial restorations, or previous repairs, it’s worth conducting a thorough inspection. Missing plates or improperly fitted air ducts can significantly reduce cooling efficiency.
Leaky air ducts on the fan housing
Cracks, poorly fitting housing parts, missing gaskets, or bent panels allow cooling air to escape before it reaches the cylinders, cylinder heads, and oil cooler.
Mouse nests, leaves, and foreign objects
Nests on the cylinders or near the oil cooler act as thermal insulation. They can lead to severe overheating. Therefore, the engine compartment should be thoroughly inspected after prolonged periods of inactivity.
Stress from commercial vehicle operation
A-Series delivery vans were often subjected to greater stress than sedans. Heavy payloads, long trips, stop-and-go driving, steep inclines, or driving in high ambient temperatures generate additional heat. Proper cooling is therefore particularly important.
Not all overheating is caused by the cooling system
If an A-Series delivery van overheats despite a clean oil cooler and unobstructed airflow, the ignition, carburetor, air leaks, and valve clearance should also be checked.
Incorrect ignition timing, a mixture that’s too lean, secondary air, or improperly adjusted valves can increase the combustion temperature.
Sustained high RPM in hot weather, headwinds, on inclines, or when fully loaded also generates a lot of heat. The engines are robust, but their cooling system only works reliably if the airflow, oil cooler, oil condition, and engine settings are correct.
If good oil is used, the oil cooler is unobstructed, airflow is unimpeded, the ignition is properly adjusted, and the carburetor is not set too lean, even longer trips with these delivery van models are possible without issues.
How can you tell if there are cooling problems?
Possible signs of cooling problems include:
- decreased power when the engine is warm
- Rattling or knocking under load
- an unusually hot oil smell
- very thin oil after driving
- Hot-start problems
- Increasing oil leaks
- Noticeable discoloration on engine parts
- Reduced heating performance despite a warm engine
- Unusual noises coming from the fan area
- A V-belt that slips or wears out rapidly
An oil temperature gauge is not strictly necessary for standard vehicles, but it can be helpful during frequent highway driving, summer operation, mountain driving, long trips, or when carrying heavy loads.
Practical Checklist for the Cooling System of A-Series Delivery Vans
- The oil level should be checked before long trips.
- The front cooling air intake must remain unobstructed.
- Any winter cover that may have been installed should be removed when temperatures are milder.
- During maintenance, inspect the oil cooler, fan blade, fan housing, cooling air deflectors, air hoses, and air ducts.
- After a long period of inactivity, check for leaves, mouse nests, and foreign objects in the area of the cylinders, oil cooler, and fan housing.
- If overheating occurs, also check the ignition, carburetor, air leaks, valve clearance, and oil condition.
The most important rule is: For Citroën A-Series delivery vans, cooling is only as good as the airflow. A clean oil cooler and complete, leak-free cooling air baffles are more important than retrofitted aftermarket solutions.
Citroën A-Series Delivery Vans: Fan Blade and Fan/V-Belt Pulley
On Citroën A-Series delivery van models, the fan blade is mounted at the front of the fan or V-belt pulley. This unit is secured to the crankshaft via a tapered fit.
Important: It is not the fan blade that holds the pulley on the crankshaft, but the tapered seat. The central bolt simply pulls the unit onto the taper and ensures that it sits securely there.
Individual details may vary depending on the engine, model year, and vehicle model. However, the basic principle is the same for all air-cooled A-Series engines.
Tools Required
The following tools are generally required for disassembly:
- 14-mm socket, preferably thin-walled, or a suitable wrench for the central fan bolt
- Wide flat-blade screwdriver to lock the flywheel
- Ratchet and extension, for example 1/2 inch
- Small hammer or plastic/soft-face hammer
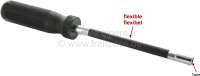
- If necessary, a special puller for the fan wheel
- Brake cleaner and fine-grit sanding pad
- Torque wrench for reassembly
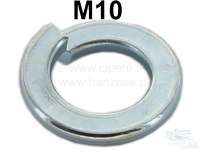
On many 602-cm³ engines, the central fan bolt is an M10 bolt with a 14-mm wrench size. For older or different engine variants, check the specific configuration on the vehicle.
Step-by-Step Disassembly
1. Disconnect the battery
First, disconnect the battery. You will be working directly on the fan and near the starter motor and crankshaft. Accidental engine rotation can be dangerous.
2. Clear the front access
Unscrew the front fan grille or front cover. Access may vary slightly depending on the van model, year of manufacture, and front design. Typically, the work can be performed from the front through the fan opening.
Be careful not to let any screws, washers, or small parts fall into the fan housing.
3. Loosen or remove the V-belt
If you’re only working on the ignition system, the V-belt can remain installed in some cases. However, it’s cleaner to disconnect the alternator, loosen the V-belt, and remove it.
Depending on the model, it may be easier to remove additional small cover plates in the area of the alternator or the fan housing. This creates more working space.
4. Loosen the central screw
Loosen the central bolt in the middle of the fan. The engine may rotate as you do this. To hold it in place, a helper can lock the engine by engaging a gear and applying the brake.
If you are working alone, you can lock the flywheel by engaging the starter gear with a wide screwdriver. Proceed with caution to avoid damaging any teeth.
Important: Never hold the plastic fan blades in place. The fan blades can break or develop fine hairline cracks.
5. Remove the screw and washer
Remove the center screw along with its washer or spring washer.
Even after removing the screw, the fan/pulley assembly is often still very tight. This is normal, as it is wedged onto the crankshaft cone.
6. Loosen the fan/pulley from the taper
The crucial step is to loosen the assembly from the taper.
After removing the center screw, place a ratchet extension or another suitable tool in the center of the pulley. Then, apply short, controlled taps to the side of the extension. While doing so, the fan should be rotated slightly further each time so that the impacts come from multiple sides.
This will gradually loosen the cone seat until the unit makes an audible or noticeable cracking sound.
A suitable fan puller can make the job easier and is particularly useful if the cone is very tight or if several attempts to loosen it have already failed.
7. Pull the fan/pulley assembly straight out
Once the cone is loosened, pull the fan/pulley unit straight forward. Avoid tilting it.
If the unit moves only a few millimeters and then gets stuck, do not pull forcefully on the fan blades. Carefully loosen the unit again by pulling straight over the center of the pulley.
What to Pay Special Attention To
The most common mistake is prying with screwdrivers behind the fan. This can damage the pulley, fan housing, or plastic fan. Striking the fan blades directly must also be avoided at all costs.
Likewise, do not strike the crankshaft axially with excessive force. Short, controlled taps are different from hard hammer blows. Excessive force can stress the crankshaft bearings, engine housing, or the tapered bore.
Check and Clean the Tapered Seat
The taper on the crankshaft and the taper in the pulley must be clean, smooth, and free of grease. Rust, burrs, scratches, or old residue can cause the pulley to run out of round later on or make it difficult to remove the next time.
Clean the cone carefully using fine abrasive cloth. Do not sand down the cone or alter its shape.
Check the fan blades
Carefully inspect the plastic fan for damage. The following are particularly important:
- Cracks in the hub
- broken mounting areas
- Damaged or dented fan blades
- visible hairline cracks in the plastic
A damaged fan should be replaced. A fan that breaks can damage the fan housing, the cooling air duct, and other components. For longer trips, it may be a good idea to carry a suitable replacement part.
Check the pulley for concentricity
Also check the pulley. If it has been pried with tire levers or screwdrivers in the past, it may be warped.
A pulley that is out of round often leads to V-belt wear, noise, vibrations, and reduced alternator performance. It also increases the risk of material fatigue and breakage.
Reassembly
Before installation, the following points should be noted:
- Thoroughly clean the crankshaft taper.
- Clean the pulley’s taper.
- Secure the fan blades correctly to the pulley.
- Place the unit straight onto the crankshaft.
- Install the V-belt correctly.
- Install the center bolt with the correct washer.
- Tighten the screw and tension the V-belt.
- After starting the engine, check that the pulley is rotating smoothly.
- Reinstall the fan grille or front cover.
For the small screws used to secure the fan blade to the pulley, a guideline torque of approximately 10 Nm applies.
Important: This value applies to securing the fan blade to the pulley. When tightening the central screw, the flywheel should be securely locked in place again.
Practical Recommendation
If the fan has not been removed for an extended period, do not apply force for an extended time. Careful, precise work is more important here than brute force.
The cone can be very tight. Damage caused by improper prying or hard blows is usually much more time-consuming to repair than using the correct tool.
After reassembly, the motor should be run briefly. Observe from the front to ensure the fan is running smoothly. The V-belt must not slip, and there must be no grinding against the fan housing.
Afterward, the V-belt tension should be checked again.


