Checking, Adjusting, and Repairing the Citroën 2CV Friction Damper
The friction damper, known as a "frotteur" in French, is a mechanical component that dampens the spring movements of the 2CV using pure friction.
How the Citroën 2CV friction damper works
The damper is located directly at the pivot point of the swing arm, i.e., where the arm is mounted on the frame.
- Construction: It consists of a friction disc, similar to a brake pad, which is pressed between a fixed plate on the frame and a plate that rotates with the swing arm.
- Principle: When the swing arm moves up or down during suspension travel, it must overcome the resistance of this clamped friction disc. A large star spring inside the housing provides the necessary contact pressure.
- Special feature: It dampens small vibrations well, but reaches its limits during hard impacts. For this reason, it was almost always combined with the round inertia dampers (batteurs) on the wheel hubs.
Years of production for the Citroën 2CV
The switch to hydraulic dampers took place gradually:
- Rear axle: Here, the friction dampers were replaced by hydraulic telescopic shock absorbers as early as September 1965.
- Front axle: Here, they remained in use significantly longer. It wasn’t until September 1975—that is, for the 1976 model year—that the front axle was also converted to hydraulic dampers as standard equipment.
- Exception: The Citroën 2CV4 retained the friction dampers on the front axle in some cases for a little longer, until this model was also fully standardized.
Checking and adjusting friction dampers
A friction damper wears out due to abrasion or corrosion of the metal surfaces.
Inspection
- Rocking test: Press down firmly on the 2CV’s front and rear bumpers. The car should not bounce back like a rubber ball but should come to a stop after one or two movements.
- Noises: Creaking or squeaking indicates dryness or a broken lining.
- Testing tool: Professionals use a lever with a weight or a spring scale to measure the breakaway torque. The lever should only move when a certain force is applied; on the front axle, this is typically around 40 to 45 kg, depending on the model specifications.
Adjustment
The damping force is adjusted via the central nut in the middle of the cover.
- Tighten the nut = higher pressure on the friction disc = stiffer damping.
- Loosen the nut = softer damping.
- Important: Both sides, left and right, must be set exactly the same. Otherwise, the car will pull to one side when braking or over bumps.
Special considerations when repairing 2CV friction dampers
When opening or servicing the friction damper, pay attention to the following points:
- Cleanliness: The friction surfaces must be completely free of grease. If oil or grease gets inside, the damper immediately loses its effectiveness.
- Wear: Check the thickness of the friction disc. If it is worn down to the rivet or the backing metal, the counterplates will be damaged. In that case, the only solution is to replace the friction damper or the friction disc.
- Star spring: This loses its tension over decades. If tightening has no effect, the spring must be replaced.
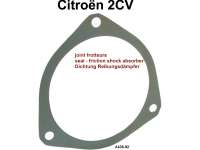
- Housing gasket: The metal cover must seal tightly with a paper gasket to prevent water from entering. Otherwise, rust and seized dampers are a risk.
A simple test device for the friction damper can be built using household items. The goal is to measure the breakaway torque, i.e., the force at which the swing arm just begins to move.
DIY Test Rig for Citroën 2CV Friction Damper
Parts needed
- A sturdy lever arm, such as a 1- to 1.5-meter-long square tube.
- A bathroom scale or a sturdy spring balance capable of measuring up to 50 kg.
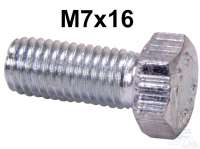
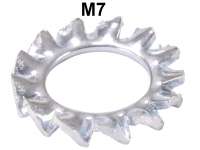
- Two screws for attaching to the swing arm.
Assembly of the test rig
- There are usually two holes on the swing arm, where the inertia damper is normally located.
- Screw the lever arm in place there so that it extends horizontally outward. If necessary, a small adapter plate must be fabricated.
- Mark the exact distance of 1 meter from the center of the swingarm bearing on the lever.
Measurement and adjustment
- Preparation: Jack up the car so that the wheels are free-hanging. Remove the tie rods and the spring tension system, i.e., the strut connecting the swing arm to the spring housing. To do this, remove the clamp from the pivot pin on the swing arm and take out the pivot pin. The friction damper must operate independently.
- Push or pull: Press down on the lever at the 1-meter point using the scale.
- Reading: Note the weight at which the arm begins to move downward.
- Front reference value: approx. 40 to 45 kg, corresponding to about 400 to 450 Nm of torque.
- Rough guide for the rear: approx. 35 to 40 kg.
- Adjustment: Gradually tighten or loosen the central nut on the friction damper until exactly the same value is achieved on both sides.
What to pay special attention to during repair
- Locking pawl: Some housing covers have a small metal tab or a retaining washer that prevents the central nut from loosening. This must be carefully bent open before adjustment.
- Surface condition: If the friction disc is glazed—that is, has a mirror-like shine—it should be lightly sanded with coarse sandpaper, such as 80-grit, to restore its grip.
- No grease: Never use grease on the friction surfaces during reassembly. Only the swing arm bearing itself may be lubricated. Take great care to ensure that nothing gets on the friction disc.
- Flatness: Use a straightedge to check whether the pressure plates in the housing are still flat. If they have warped, even a new friction disc will not provide uniform damping.