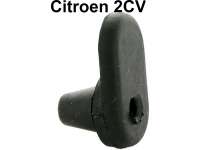
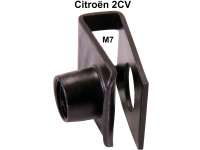
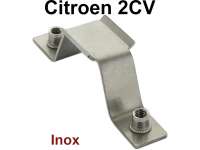
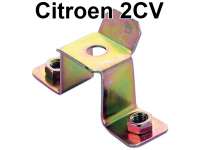
Wheel housing at the rear left, handles for the exhaust rubber rear in the wheel housing, for
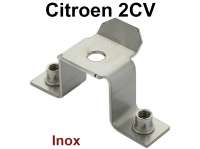
Citroen 2CV. This handle is welded in the left wheel housing. Made in Europe.


Citroen 2CV. This handle is welded in the left wheel housing. Made in Europe.
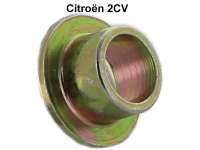
the chassis. Reproduction from high-grade steel! Or.Nr.AM18284. Made in Germany.
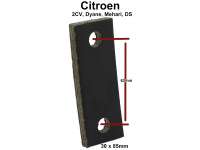
about 60mm. Suitable for Citroen 2CV6. Made in Germany.
Hole spacing: about 100m. Length totally: about 111mm. Suitable for Citroen 2CV6. Made in Germany.
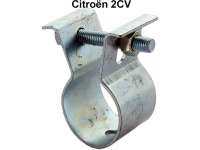
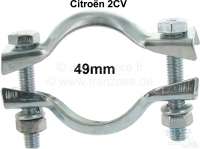
e and hold the exhaust retaining rubber. Screw connection: M6
material! Suitable for Citroen 2CV6 + 2CV4, Dyane, AMI and Mehari.
locates the rubber to the silencer). Or.Nr.: AM18388. Made in Germany.
the rubber to the silencer). Or.Nr.: AM18388. Made in Germany.
mounting material! Suitable for Citroen 2CV6 + 2CV4, Dyane, AMI and Mehari.
for Citroen 2CV6 + 2CV4. All connection diameters are the same.
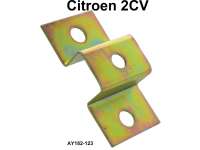
locked under the floor pan. Suitable for Citroen 2CV6 + 2CV4. Made in Germany.
locked under the floor pan. Note: Connector with 6mm screws! Suitable for Citroen 2CV6 + 2CV4. Made in Germany.
the floor pan. Suitable for Citroen 2CV6 + 2CV4. Dyane, AK
floor pan. Suitable for Citroen 2CV6 + 2CV4.
pan. Suitable for Citroen 2CV6 + 2CV4. Made in Germany.
Suitable for Citroen 2CV6 + 2CV4.
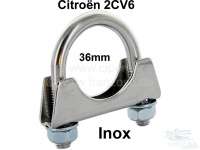
exhaust pipe: 36mm. Suitable for Citroen 2CV6.
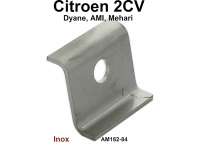
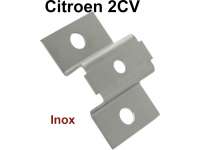
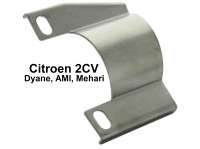
Suitable for Citroen 2CV6 + 4. this sheet metal is mounted original at the 49mm clip at the front muffler. Made in Germany.
Citroen 2CV. This sheet metal is mounted original at the 49mm clip at the front muffler. The sreening plate have long holes, so it can be mounted the different versions of the 49mm clip.
for Citroen 2CV6 + 2CV4. Or.Nr.: AM1826B
s completely around the cone of the exhaust and seals so much better. Suitable for Citroen 2CV6 + 2CV4.
the front muffler. Suitable for Citroen 2CV6 + 2CV4.
s completely around the cone of the exhaust and seals so much better. Suitable for Citroen 2CV6 + 2CV4.
Mehari. According to our more than 35 years of experience, the only front silencer for the 2CV that fits really well.
material is provided (unfortunately not made of stainless steel)!
exchangers are like the original, and also have the foam on the flaps. But the 2CV with stainless steel heat exchanger sounds slightly different (louder, more metallic). Attention: The heat exchangers fit only on the Citroen 2CV6 (Dyane, Mehari, AK, AMI8), until 1990, not suitable for 2CV4.
original, and also have the foam on the flaps. The heat exchangers are black powder coated. Attention: The heat exchangers fit only on the Citroen 2CV6 (Dyane, Mehari, AK, AMI8), until 1990. Not suitable for 2CV4.
substitute for through-rusted pipes. Caution, it is only the pipe, not the kompette heat exchanger.
through-rusted pipes. Caution, it is only the pipe, not the kompette heat exchanger.
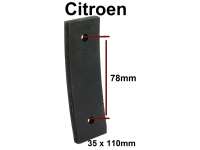
typical trim from the fifties + sixties. Total length: 135mm.
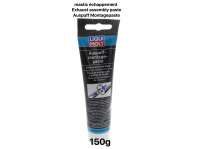
compound hardens when heated. Very helpful!
Every internal combustion engine produces a characteristic "exhaust sound" due to the pulsating gas flow from the cylinders. To achieve this, it is necessary to reduce the sound energy of the exhaust flow. There are two ways to reduce sound: absorption and reflection. These processes primarily take place in a muffler. Aside from its sound-dampening function, the exhaust system is also exposed to extreme conditions. The fuel-air mixture in the cylinders heats up suddenly to as high as 2,400 °C. As a result, the gas expands and shoots into the exhaust system at supersonic speeds. This produces explosion-like banging noises, which must be reduced by 50 dB(A) from the engine exhaust valve to the end of the exhaust system. In addition to these temperature and pressure stresses, the exhaust system must absorb vibrations and oscillations originating from the road surface. Furthermore, the exhaust is exposed to corrosion from hot gas, acids, splashing water, and salt water.
The exhaust system of the Citroën 2CV6 remained unchanged throughout its production run. It consists of 4 exhaust components:
Only the tailpipes differ. On the standard 2CV6 and Dyane 6, only the long version is available, which ends at the rear left under the bumper (11004).
The Fourgonette (AK panel van) and the Mehari had a short tailpipe that exits to the side in front of the left rear wheel. Due to their slightly longer wheelbase, the panel van versions of the Dyane had a longer short tailpipe that also ends in front of the rear wheel.
For the 2CV6, we use only exhaust systems from the manufacturer Walker (as long as they are still available). These have proven their quality to us over the past 38 years. The fit of the front silencer (which can sometimes be a source of frustration with other manufacturers) is also really good.
Of course, all clamps and rubber mounts for the exhaust system are also available from us. We also carry a stainless steel exhaust system with approval for the 2CV6. And naturally, we also offer complete exhaust systems, including all clamps and mounting rubbers (11020). By the way, the exhaust system on the Dyane is identical in construction to that of the 2CV6.
The 2CV’s exhaust system is designed so that no gaskets are required. Furthermore, the connecting pipes of the front silencer are neither too short nor incorrectly bent (at least not with our front silencers). Citroën achieved ample installation clearance in the 2CV by using half-clamps.
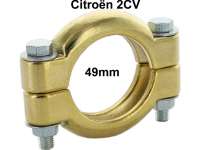
To install the pre-silencer, it is necessary to carefully loosen the front heater bulbs (heat exchangers) on the exhaust manifold. The heater bulbs can be adjusted up, down, and sideways. In the next step, hook the front silencer onto the transmission, taking care not to screw it tight. Align the connecting pipes of the front silencer with the heater cores and carefully screw them on loosely using the 49 mm clamps. Caution: Do not tighten the clamps!
In the next step, the heating bulbs are tightened back onto the manifold, and only then are the clamps for the front silencer tightened. After that, the rest of the exhaust system is mounted under the vehicle and loosely bolted starting from the S-pipe at the front silencer (47 mm exhaust clamp). The exhaust system is thus loosely mounted so that it can still be aligned. Make sure that the mounting rubber mounts are not under tension (especially those on the rear silencer).
Once everything is aligned, begin securely bolting the S-pipe to the front silencer. Now tighten the remaining exhaust clamps, and finally, properly tighten the mounting rubber mounts. Please note that only 47 mm clamps should be used when bolting the front silencer to the S-pipe. Make sure that all other half-clamps are 49 mm in size. Do not mix up the 49 mm and 47 mm exhaust clamps! Otherwise, leaks may occur!